21 minutes
Hello World
Introduction
Hello world! I’m Wraith and in an attempt to better myself as well as teach others, I wanted to start a blog to blog about all things Cybersecurity & IT. I figured what better way to start off than with a blog post about setting up Hugo to write a blog (so meta). In my attempts to set one up I ran into a lot of issues along the way, mainly outdated tutorials, or me not reading the docs fully (I have a bad habit about this and will skim them in an attempt to go fast).
My hope is that I can make this a comprehensive ’tutorial’ on how to do the following, with explanations as to why I chose certain things:
- Make a hugo blog.
- Host it on github pages with a source and page repository, you'll learn how to use github actions to help automate deployment here.
- Host it on github pages using a custom domain.
Without further ado, as the great Samuel L. Jackson once said “Hold on to your butts”.
Intro to Hugo and Pre-FAQ
What is Hugo?
https://gohugo.io/
Hugo is one of a few open-source static site generators, I’m honestly not super familiar with them or web development as a whole really. Basically with very little setup and a multitude of themes to choose from, in about 10 minutes you can have a pretty nice looking blog for very little effort. Within those 10 minutes, you get it installed and download a theme and configure a .toml file and have it pretty much setup, it generates all of the static html/js/css for you and you can go on your merry way.
It also has some pretty cool extra features. Like when testing your site locally, the LiveReload feature (I’m using this as I write this post) will automatically detect changes and update it in your browser on the fly. There is also shortcodes which make it relatively easy to embed things like youtube videos or other content within your posts.
Why host on github pages?
That question has a few answers:
1. Cost. You don't need to pay for hosting on a VPS (although this is admittedly cheap, DigitalOcean can cost like 6$ a month and is useful to at least have an account for.).
2. Security. You don't have to worry about securing the box it sits on, Github handles that. They also handle getting TLS certificates set up so you can use HTTPS like a good little internet steward.
3. Version Control. If you don't know git gives your source version control. If you ever accidentally `rm -rf` your blog locally, its still in github and you can just pull it.
4. Automation. You can also use some nifty stuff through Github Actions to automate deployment of your site and make it easy to manage. Its a bit of work, but once you get it setup its worth it in my opinion.
Why use a custom domain name?
Simply put, it just looks more professional in my opinion. Plus I personally have started slowly buying domains for projects or vanity so I may as well use them, especially since I can with gh-pages.
Steps
Install Hugo and Setup Blog
This is pretty easy, most if not all ’tutorials’ out there cover this, Hugo’s Quick Start does a good job of this(At the top, there is a link to install which shows you how to install Hugo on other systems, if you don’t have Fedora Linux like I do, I would divert here. I’m using Fedora Linux as my desktop so this tutorial will be focussed around doing this on Linux specifically.
First off, you can just install via the terminal like so:
[wraith@ghostbustersinc ~]$ sudo dnf install hugo
#. . . a bunch of install stuff . . .

[wraith@ghostbustersinc ~]$ cd ~/blogs && hugo new site myblog && cd myblog

Congratulations! Your new Hugo site is created in /home/wraith/blogs/myblog.

Just a few more steps and you're ready to go:

1. Download a theme into the same-named folder.
   Choose a theme from https://themes.gohugo.io/ or
   create your own with the "hugo new theme <THEMENAME>" command.
2. Perhaps you want to add some content. You can add single files
   with "hugo new <SECTIONNAME>/<FILENAME>.<FORMAT>".
3. Start the built-in live server via "hugo server".

Visit https://gohugo.io/ for quickstart guide and full documentation.
Congrats! You’ve just created a blog! Look at you go sport.
Themeing
Now we need to add a theme which is also pretty easy. You just need to follow the output from hugo new site myblog above and go find a theme to download. For this blog (and tutorial), I chose ‘hello-friend-ng’. Now at this point you can choose a few methods to get the theme, download the theme and unpack it manually or use git clone or git add submodule. Downloading is potentially the easiest if you’re not familiar with git, but if you to use git already… you may as well use it right? (Plus learning things is fun!). I’ll explain both and their differences below:
- git clone
- What most theme docs suggest you do. You clone the theme from the source repository as is. This means you won’t get any updates if the theme gets updated however.
If you plan to just use the theme as-is, this is the easiest option (Its what I did, even though I made a tiny CSS change).
- Git also won’t like it when you push the outer repository (your blogs source control) and will omit the contents of the inner repository (the theme) so if you want to do this, just use git clone to get it to your machine, then do
rm -rf themes/hello-friend-ng/.gitto remove its status as a git repository. - git add submodule
- You add the theme as a submodule, for this you’ll likely want to fork it on github so you can maintain your own repository and its changes on your account. You can also fetch updates for the fork to make sure your theme is as up to date with the creator’s as possible.
This is your bet if you plan to do some heavy customization as you can add the submodule and make another repo for it in github so you can track versions.
From the hello-friend-ng docs, just choose one of the above methods. The theme needs to live in your ’themes/’ directory under the blog for it to be useable, and you can have as many as you want there incase you want to change it up often.
[wraith@ghostbustersinc myblog]$ git add submodule https://github.com/rhazdon/hugo-theme-hello-friend-ng.git themes/hello-friend-ng
# . . . git stuff . . .
- Now you have to edit your config.toml in the base directory of your blog. Not only does this configuration file contain information for the blog website as a whole, but many themes allow you to customize specific facets of the theme in here as well.
- Warning: Each theme’s configuration options may be different! Keep this in mind when switching themes.
Here is an example of my customized config file which is based off of themes/hello-friend-ng/exampleSite/config.toml, I’ll explain what all the options do with comments:
baseurl = "https://blog.wraith-sec.com/" # The url from which your blog should be accessed. If you don't use a custom domain, this should be https://username.github.io/.
languageCode = "en-us"
title = "wraith-infosec" # The title on the front page.
theme = "hello-friend-ng" # Choose your theme here :)
paginate = 10 # Number of results you'll see on a page
rssLimit = 10 # Sets the limit of items for RSS feeds so someone can create a feed to watch for your blog
publishDir = "docs" # Where hugo publishes the static site files. This is what your browser interperets.
contentDir = "content" # Where your posts will go.
dataDir = "data" # Various data for the static site
layoutDir = "layouts" # This is where layouts for each content type are defined, you can create custom ones here.
enableRobotsTXT = true # This lets a search engine index your site, so you can be googled!
enableEmoji = true
[markup] ## This whole section sets your syntax highlighting for code fences, the 3 backticks: https://gohugo.io/content-management/syntax-highlighting/#highlighting-in-code-fences
[markup.highlight]
codeFences = true
tabWidth = 4
style = 'dracula'
#[permalinks] ## This allows you to set up url formatting for your various content types. I turn commented out b/c it makes finding specific posts a mess.
# posts = "/posts/:year/:month/:title/"
[author]
name = 'wraith'
[params] ## Full of a bunch of general params for your site.
dateform = "Jan 2, 2006" # Sets the forms the dates will be displayed.
dateformShort = "Jan 2"
dateformNum = "2006-01-02"
dateformNumTime = "2006-01-02 15:04"
homeSubtitle = "Veteran & Security Researcher"
description = "Just your suprisingly mediocore security researcher." # This may not be displayed, but a description when you link to your site.
disableReadOtherPosts = false # Set to false, let you navigate forward/backward posts in a blog post.
enableSharingButtons = true
keywords = 'blog'
[params.footer] ## Controls content at the bottom
trademark = false
rss = true
copyright = false
author = true
topText = []
bottomText = [
"Powered by <a href=\"http://gohugo.io\">Hugo</a>",
"Made with ❤ by <a href=\"https://github.com/rhazdon\">Djordje Atlialp</a>"
]
[params.favicon.color] ## Sets the color for favicons (icons in your browser tab). I don't have one set so this is useless as is.
mask = '#4af626'
msapplication = "#4af626"
theme = "#4af626"
[params.logo] ## Again different per theme
logoMark = ">"
logoText = "$ cd /home/"
logoHomeLink = "/"
logoCursorAnimate = "2s"
# [params.portrait] ## Same as above. It should be noted that for images, they go in the 'static/' directory. So that path is 'static/img/wraith.png'
# path = "/img/wraith.png"
# alt = "Portrait"
# maxWidth = "50px"
#[params.commento] ## For using commento (https://commento.io/) a way to add the ability to comment on posts to your blog! However it is paid, so I neglected to use it.
# url = ""
[taxonomies] ## Think of these as the equivalent of tags, this sets up the various tag types you can use. So I can mark posts as having tags, or being part of a series/etc.
categories = 'categories'
series = 'series'
tags = 'tags'
#dev, ctf
[languages]
[languages.en]
title = "wraith-infosec"
subtitle = "A simple theme for Hugo"
keywords = "blog, cybersecurity"
copyright = '<a href="https://creativecommons.org/licenses/by-nc/4.0/" target="_blank" rel="noopener">CC BY-NC 4.0</a>'
readOtherPosts = "Read other posts"
[languages.en.params.logo]
logoText = "cd ~"
logoHomeLink = "/"
[[menu.main]] ## Adds main menu option buttons.
name = "/blog" # The 'link' as it appears on the website.
identifier = "blog" # The identifier, if you have multiple links with 1 identifier, only the LAST one will be displayed on the site.
url = "/posts" # The link the item resolves to. These exist within /content, this can be a folder (for blog posts) or a file.md for an aboutme page!
weight = 1 # Measure of how high priority a menu item is, so 1 is highest (left most), 99 is lowest (right most).
[[menu.main]]
name = "/dev"
weight = 80
identifier = "dev"
url = "/tags/dev"
[[menu.main]]
name = "/ctfs"
weight = 94
identifier = "ctf"
url = "/tags/ctf"
[[menu.main]]
name = "/about"
weight = 95
identifier = "about"
url = "/aboutme"
[[params.social]] ## This is where you'll add your social media buttons. Per the hello-friend-ng docs the list of 'names' are in themes/hello-friend-ng/docs/svgs.md
name = 'email'
url = 'mailto:mynamehere@gmail.com' # Just a syntax to allow people to click and immediately email you
[[params.social]]
name = 'twitter'
url = 'https://twitter.com/mynamehere'
[[params.social]]
name = 'reddit'
url = 'https://www.reddit.com/user/mynamehere'
[[params.social]]
name = 'github'
url = 'https://github.com/mynamehere'
Once you save this config.toml you should have pretty much what you need! Now lets make a post and test it! Open a terminal and run hugo new posts/rickroll.md.
Once you’ve done that open up content/posts/rickroll.md in your favorite editor (VIM is the only way 😄).
---
title: "Rickroll"
date: 2022-05-28T16:07:19-04:00
draft: true
---
You’ve successfully created your first post! Notice at the top the piece between the ---, thats called Front Matter, its a way for you to have metadata about your content.
Lets go ahead and change that to see some of the options you can add and add some content!
---
title: "Rickroll"
summary: "Messed up my git workflow"
description: 'Never gonna give you up...'
date: 2022-05-26T18:27:40-04:00
draft: false
toc: true
tags:
  - dev
series: ['Go learn things!']
---

## RickRoll'd
{< youtube w7Ft2ymGmfc >}}
Add another { to the beginning of each curly brace line above, I had to take it off so Hugo wouldn’t interperet it.
- Lets break down the ambiguous things we just added.
- date
- This is the ‘publish’ date of your content.
- draft
- This value determines if this is a draft piece of content or published. Hugo by default doesn’t display drafts.
- toc
- This adds a table of contents similar to what I have at the top of this blogpost
- tags|series
- This is from those taxonomies earlier. Since we defined them, we can now ’tag’ content to be able to be grouped together.
For tags, you can click on these at the bottom of the post, or just got to ‘yoursite/tags/tagname’ and view them all together. For the series you should be able to do the same via url, or make a link button to it!
- {< youtube goblygook >}
- This is one of those shortcodes I spoke of earlier. If you go to the docs you’ll see how to use them for various media.
Awesome! I think we’ve got a good first step here. Now lets test it out! In a terminal run hugo server -D, then in your browser navigate to http://localhost:1313. -D tells hugo to publish even drafts (we don’t need that here however), and by default serves it up on 127.0.0.1 on port 1313 for you to access.
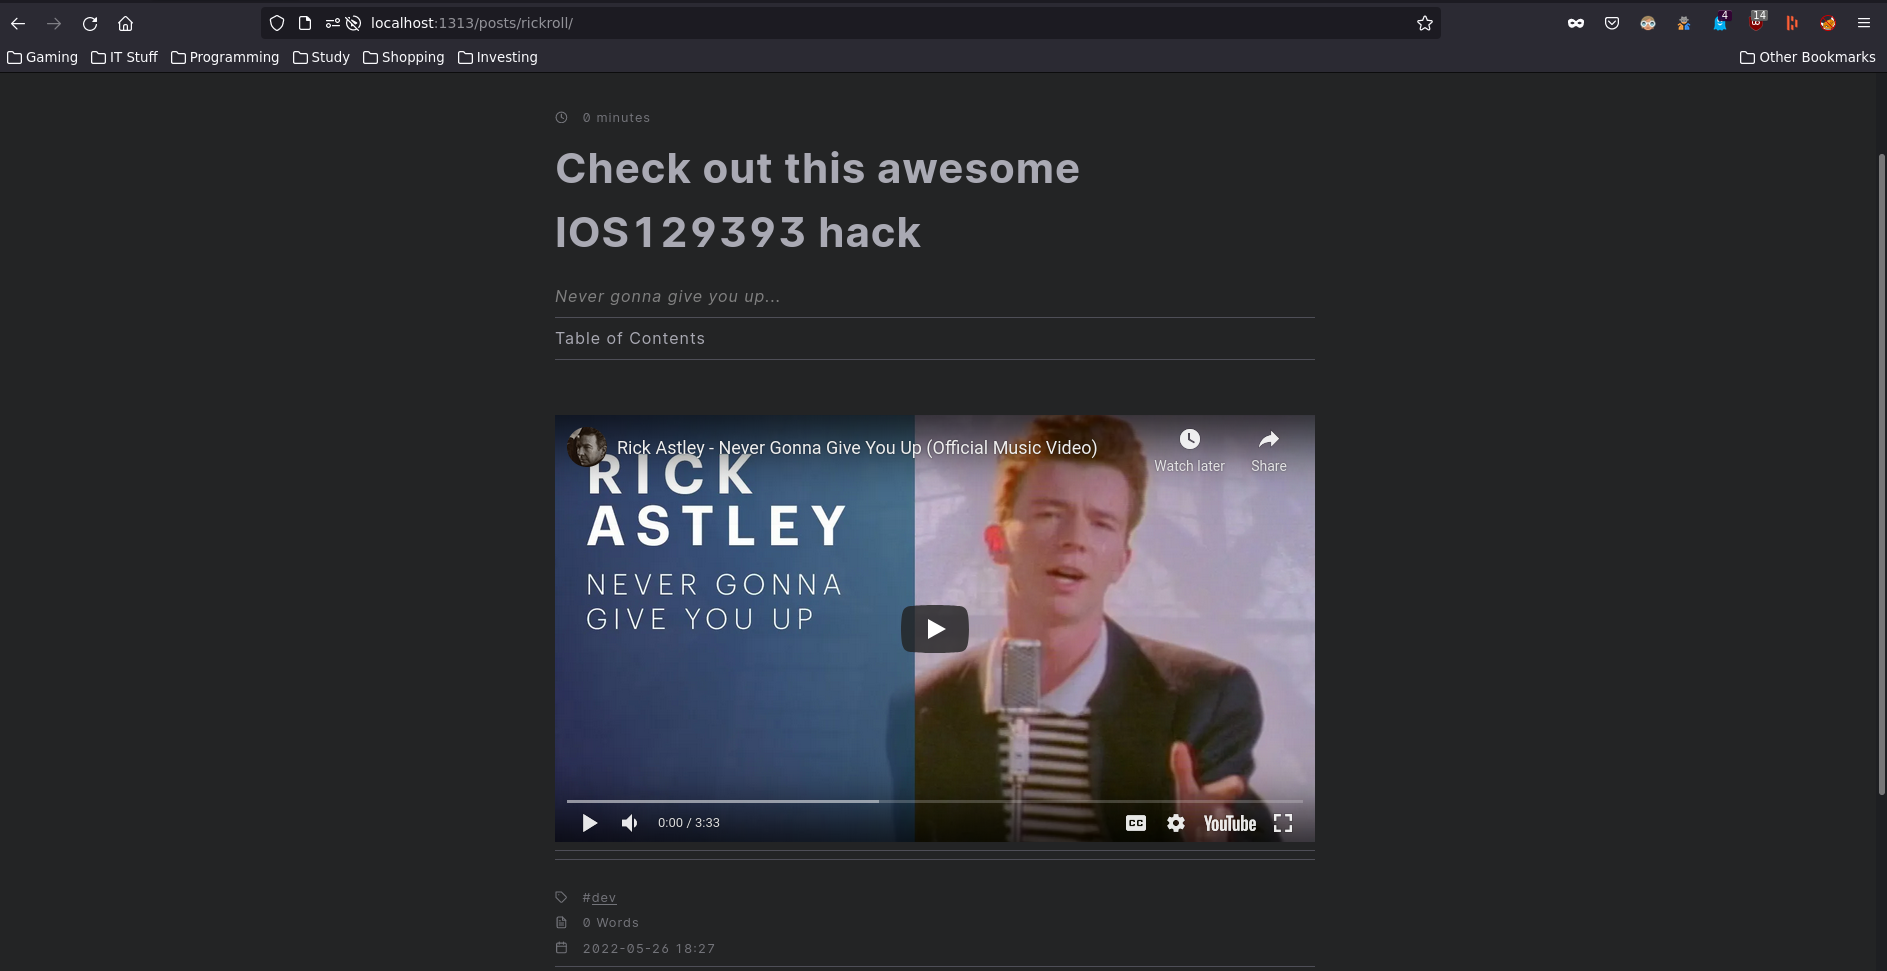
Our first post! Great success!

Setup the repositories
Now that we have a blog with a post in it. We want to set up version control for the source, as well as another repository for the github page. But couldn’t you just put both the source code and the published site into one repository?
Why yes, yes you can. However, for a github-pages site to work, it must be a public repository. So whenever you are working on a new post that you haven’t released yet, someone could come along and manually delve into your content directory and see it. That would suck if for example, it was the potentially first blog post about a new strain of malware to get you noteriaty as a security researcher and someone else just stole it before you could publish it. You could also choose to just host your source offline, and not in git. However, if you accidentally destroy it, then its all gone and you’d have to go through the trouble of editing the published repo manually.
Source repo
So lets get into it, first lets create that repository in github, for this one make it private.
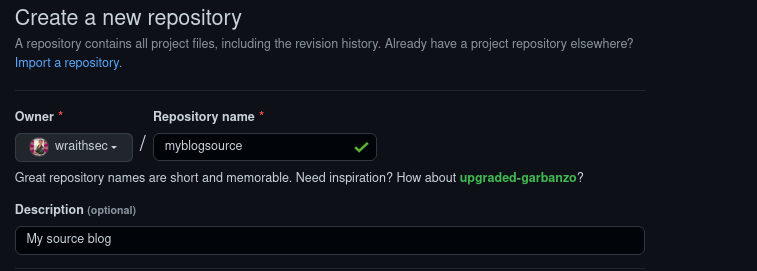
From there, follow the directions given on the page for the repo to create a local one and connect it to use the one on github as its origin. Notice, I do git add . instead of git add README.md here, thats because add . makes git track ALL files in the current working directory.
git init
git add .
git commit -m "first commit"
git branch -M main
git remote add origin git@github.com:wraithsec/myblogsource.git
git push -u origin main
Small sidenote here, I use SSH instead of HTTPS (notice how the link is git@github instead of https://github.com) because with an key for SSH I can do pulls/pushes without having to ever type my password in. There is a part of this tutorial that will go over creating those keys and setting them for repositories, however if you wish to set it for your user there is a fine tutorial on how to use SSH.
Next, we’ll need to do this later but before moving on to the pages repository, I want to do a little bit of setup for our automatic deployment so that every time we push a change to the source control repository, it will regenerate and deploy to github-pages.
First, we need to add a .gitignore file and make sure docs/ is in there. This will ensure that our source repository won’t track our static output for the pages site.
Second, we will want to get an ssh key ready for the auto deployment. This is required by the github actions we will make for this repo later to automatically deploy changes.
[wraith@ghostbustersinc myblog]$ echo "docs" >> .gitignore
[wraith@ghostbustersinc myblog]$ ssh-keygen -t rsa -b 4096 -C "$(git config user.email)" -f ~/.ssh/myblog-gh-pages -N ""
[wraith@ghostbustersinc myblog]$ ls -l ~/.ssh/myblog*
-rw-------. 1 wraith wraith 3389 May 28 17:56 /home/wraith/.ssh/myblog-gh-pages
-rw-r--r--. 1 wraith wraith  751 May 28 17:56 /home/wraith/.ssh/myblog-gh-pages.pub

[wraith@ghostbustersinc myblog]$ cat ~/.ssh/myblog-gh-pages
-----BEGIN OPENSSH PRIVATE KEY-----
b3BlbnNzaC1rZXktdjEAAAAABG5vbmUAAAAEbm9uZQAAAAAAAAABAAACFwAAAAdzc2gtcn
NhAAAAAwEAAQAAAgEAu275sx1YLTE4MPiqPcPk3vs9SWLuIMeyh9t1vBZbaOJW0BCAyY8P
2hVXgM93857jX9+2pA+n/032luOX2ozNXVPf1VGXq+bXeAo4fGuV42K5fcxwBqsFzG+esr
NbQPDfRdae7FySeJeToxG3FFTVE41PkptZ6qwS7ztmvQk0Xvy8iCrz/Dd8LY6N9j2eatwK
. . . OPENSSH KEY STUFF . . .
nAcRmhYQr0KtsbRwo5SKakuxi4NDTLDvFa7Wxe+D1bw6VcQufq5tYNs9Kj9dkPIc++e1fB
Tjs0Y7rHujcAAAAZc29saWRfaGFidVJFWEBvdXRsb29rLmNvbQEC
-----END OPENSSH PRIVATE KEY-----
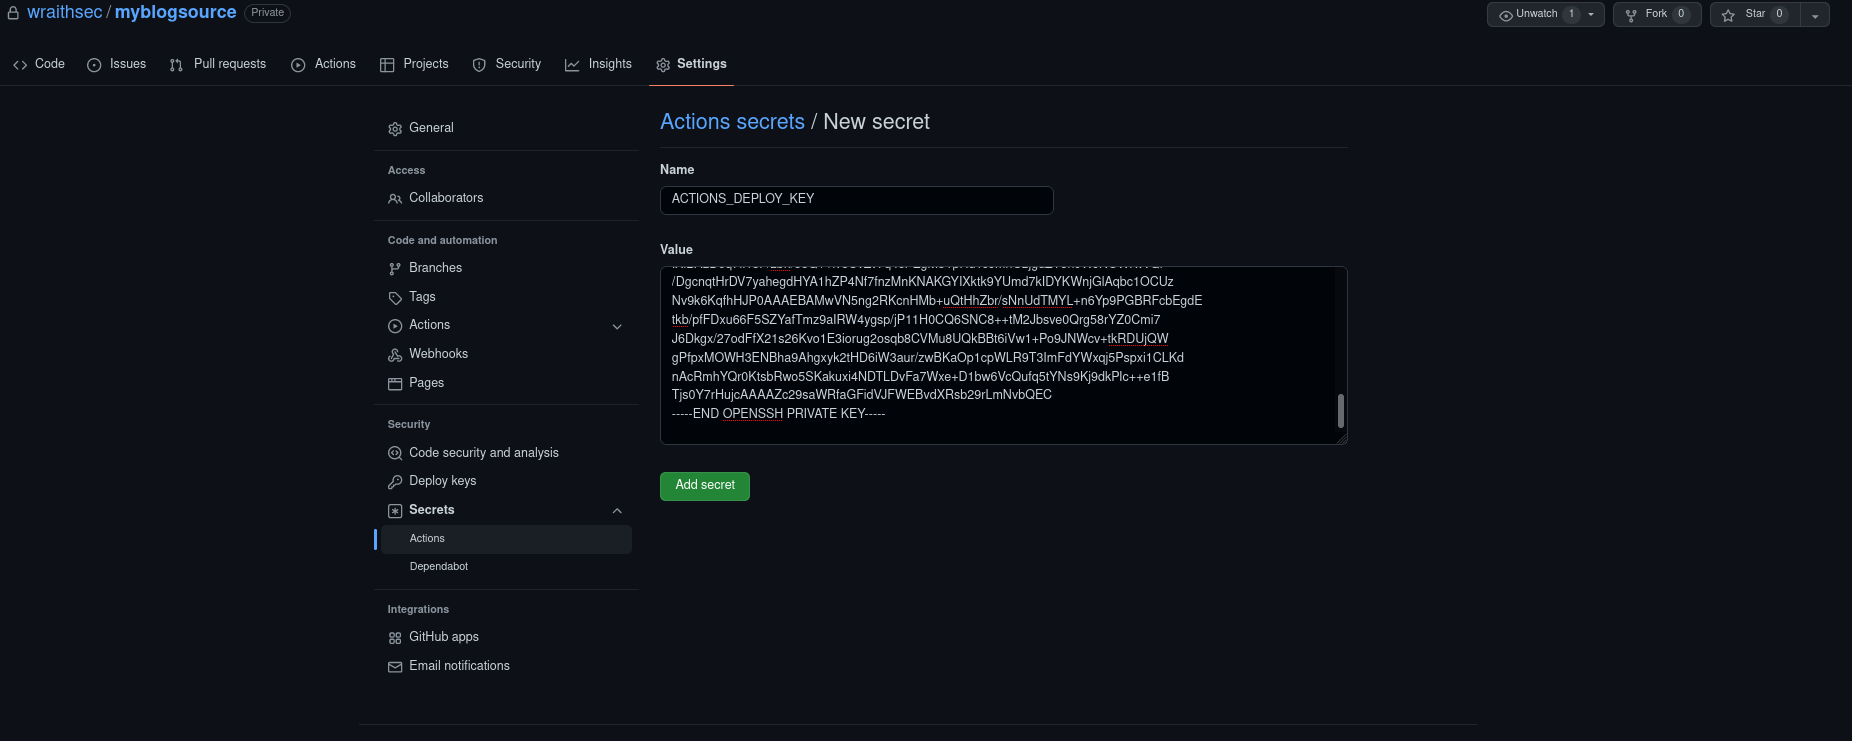
Now that you have that key made, you’ll want to navigate to where you can place the key as a environmental variable (this is for the github action which we will setup at the last step). From the repostories ‘code’ page click settings > secrets (left side) > actions > New repository secret, name it ACTIONS_DEPLOY_KEY and paste the entire value of the OPENSSH PRIVATE KEY in there, then click add secret.
Setting up the pages Repo
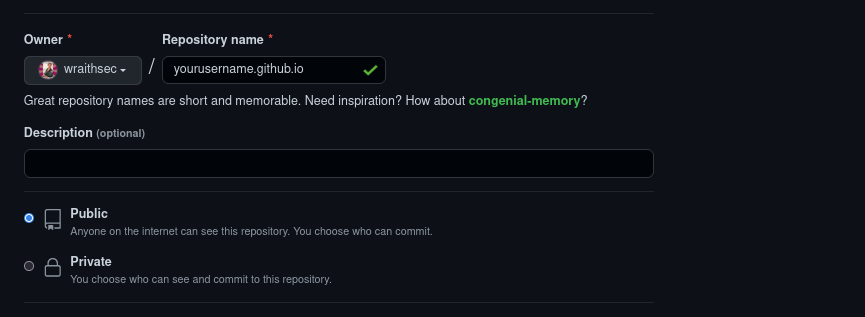
Now we want to setup the pages repo, this will be the repository that contains all of our published static html. It has to be named username.github.io and MUST be public. Other than that, follow the same procedure as before to create it on Github with the afformentoined differences.
Now we need to do a few extra steps before making this repository correctly, first we run hugo to have hugo generate the static site content, by default this is in docs/. Next we go inside, and init it to our newly created git repository. Since we made the gitignore earlier telling the source repository to ignore the docs/ folder, when we push that repository it won’t complain that there is another repository inside of it, if you didn’t want to use the .gitignore file, you would need to ensure you add this as a submodule to the parent repository. I just thought the ignore was easier.
hugo
cd docs
git init
git add .
git commit -m "first commit"
git branch -M main
git remote add origin git@github.com:wraithsec/yourusername.github.io.git
git push -u origin main
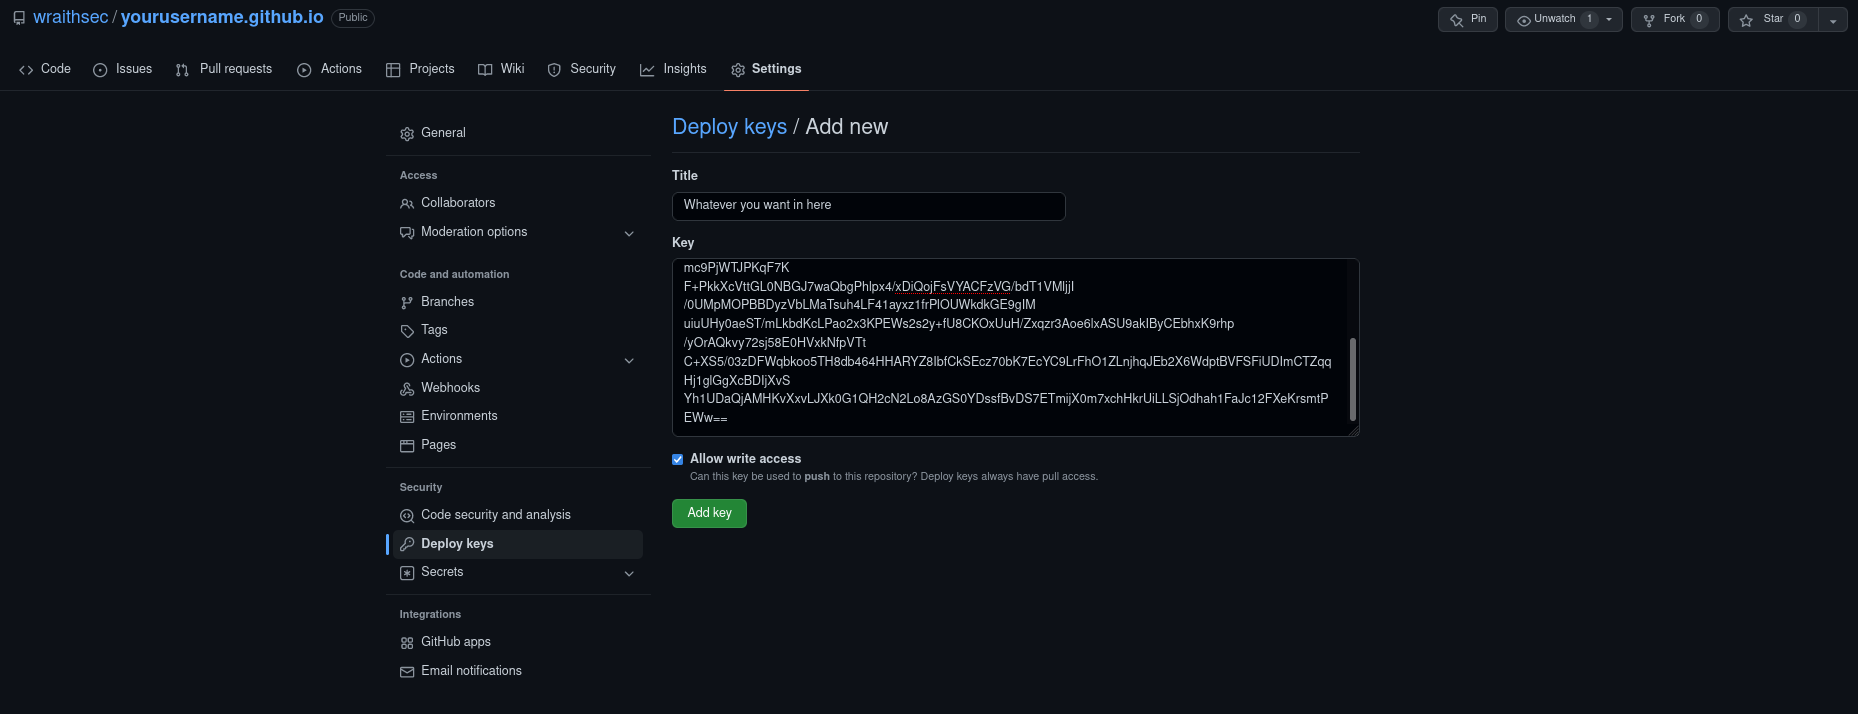
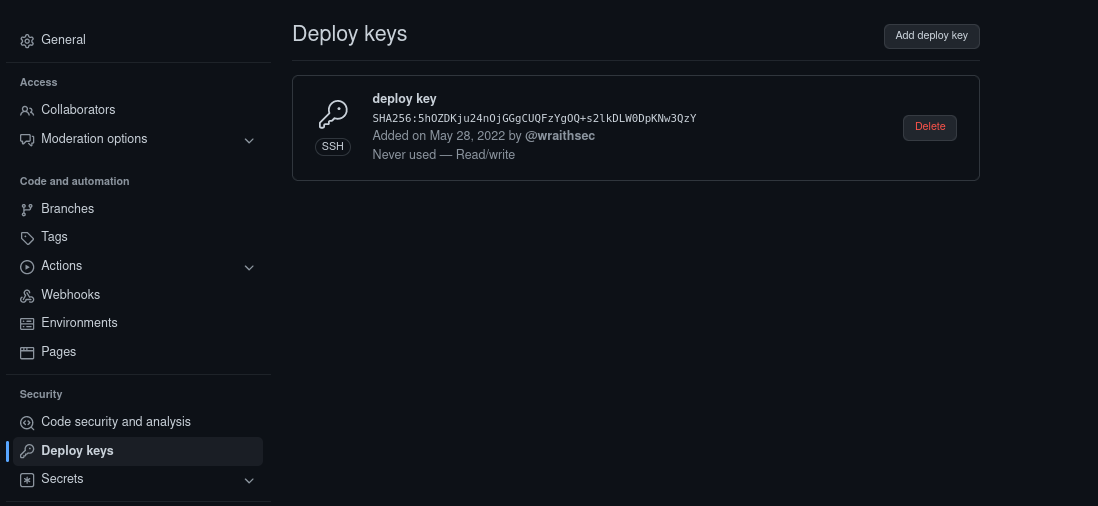
From here we need to setup the public deploy key from earlier, this is what will allow the previous repositories github action to push contents to this repository. From the code page here click settings > deploy keys (left side) > add deploy key and add your public key, simply doing cat ~/.ssh/myblog-gh-pages.pub should work (it may not be there if you didn’t save it there). Make sure you allow write access for this key, paste the public key contents in there and click add key.
 Now, inside of the settings page, go to the
 Pages tab under Code and automation, this is the page that will allow us to serve this page using github pages. Choose the branch as main and the folder as / then click save. Once you do that go ahead and go back to your code page and as soon as you see the green check near the commit, navigate to yourusername.github.io. At this point you should see your page, happy days!
At this point, its going to get kind of cumbersome to update your site, if you make a config change or anything, you’ll need to do a few steps like below.
[wraith@ghostbustersinc docs]$ cd ~/myblog
. . . Makes changes . . .
[wraith@ghostbustersinc docs]$ git add . && git commit -m "A new commit has appeared" && git push
. . . just git things . . .
[wraith@ghostbustersinc docs]$ hugo && cd docs
[wraith@ghostbustersinc docs]$ git add . && git commit -m "Ive added new content" && git push
. . . more git things . . .
That can be annoying. For every change, you’ll have to make two pushes to two separate repositoies, there MUST be a better way. And there is 😄. Using Github Actions we can automate workflows every time certain events occur, lucky for us there are already ways to automate deployment of a page, for now go back to the source repository and add the following file in there, you can read teh comments to get context on what the various pieces are.
[wraith@ghostbustersinc docs]$ cd ~/myblog && mkdir -p .github/workflows && touch .github/workflows/gh-pages.yml

### CONTENT of gh-pages.yml to add
name: hugo publish                               # name of the action

on:
  push:
    branches:
    - main                                        # Set a branch to deploy from

jobs:
  build-deploy:                                   # This runs hugo on your repository from a vm and then also publishes it to the specified repository using the specified key.
    runs-on: ubuntu-20.04
    steps:
      - uses: actions/checkout@v2

      - name: Setup Hugo
        uses: peaceiris/actions-hugo@v2
        with:
          hugo-version: 'latest'

      - name: Build                                                #
        run: hugo --minify

      - name: Deploy
        uses: peaceiris/actions-gh-pages@v3
        with:
          external_repository: wraithsec/yourusername.github.io     # The repository to publish.
          publish_branch: main                                      # The branch to publish to (on the external repository)
          publish_dir: ./docs                                       # The branch to publish from (from the top repo)
          deploy_key: ${{ secrets.ACTIONS_DEPLOY_KEY }}             # Grabs that secret private key we added earlier
          allow_empty_commit: false
          commit_message: ${{ github.event.head_commit.message }}
### CONTENT

[wraith@ghostbustersinc docs]$  git add . && git commit -m "Added a deployment action!" && git push
Now from then on, any time we make a change on the main branch and push it, it will automatically build the new content and push that to the main branch of our github pages repository! How cool is that?! An example is below…
[wraith@ghostbustersinc myblog]$ git add .
[wraith@ghostbustersinc myblog]$ git commit -m "Changed subtitle in config"
[wraith@ghostbustersinc myblog]$ git push
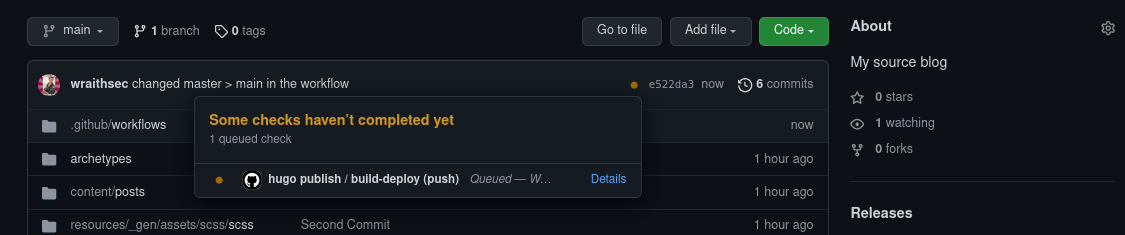
The yellow dot shows the action is currently running, you can click on it or the actions tab at the top to go view the action as it runs. When it runs successfully you’ll see a green checkmark.

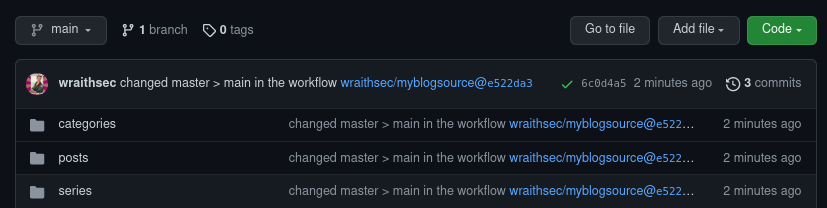
And if you navigate to your yourusername.github.io repository, you will see a commit happend not too long ago with your new content. The commit message is the giveaway that the action from the previous repository made the commit. Yay automation!
Adding a Custom Domain Name
Now you could just stop here, and there is nothing wrong with that. But by golly, I’ve bought these domain names so I’m going to use them. Because I don’t want to cause any issues with my current setup I am going to show examples using this blog.
First, you need to own a domain. I use namecheap personally, and thats what I’ll use to show my examples, go to your registrar page and somewhere there should be settings for DNS, for me its under manage > advanced DNS. You need to create a CNAME record and an A record. This will take a few moments to propogate and could be anywhere up to 24 hours.
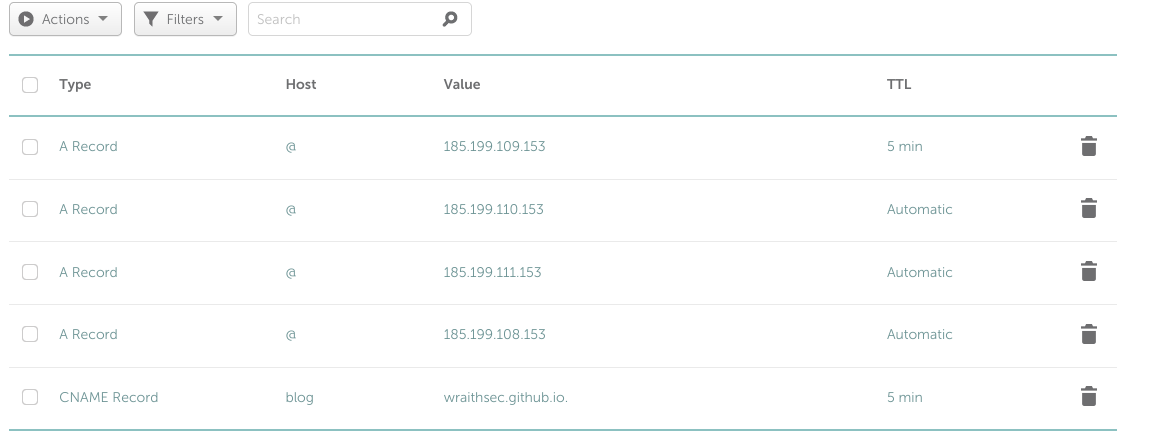
- A record
- This is a record which points your domain name at a specific host, in this instance we’re pointing my domain (wraith-sec.com) at the github.io servers.
- The @ in the ‘host’ field specifies the root domain points to those ip addresses.
- CNAME record
- This provides a alias for a hostname, in this particualr case, we’re telling it that blog.wraith-sec.com aliases to wraithsec.github.io (our github page we setup remember?), this triggers a second DNS lookup to give us one of the a records above.
Next you’ll want to make two changes to your source repository. First you want static/CNAME to exist and contain yourcustomdomain.com that you own from [insert domain provider here]. Secondly, you want to update the baseUrl of the config.toml to specify the new domain. Example below of my setup.
[wraith@ghostbustersinc wraithblog]$ cat static/CNAME
blog.wraith-sec.com
[wraith@ghostbustersinc wraithblog]$ head config.toml
baseurl = "https://blog.wraith-sec.com/"
After that do an add/commit/push of the source repository and navigate to your pages tab under settings for the public repository. You should see the custom domain name fill in automatically (this is thanks to the CNAME file), if not fill it in yourself and click save.
Github will attempt to do a DNS check at this point, to make sure it exists. It will then attempt to verify you own the domain, this is done through a TXT record where it tells you to create a specific TXT record with a specific value, think of it as a one time pad. When you do that, it will check for that record and upon seeing it will know you own the domain. As long as your names all match up (your records in your dns provider, the CNAME, and the baseUrl of config.toml) Github should automatically reach out to Let’s Encrypt, generate TLS certs for your blog page and set it up so that https just works when browsing to your blog :). At this point I enforced https on my site personally.
Closing
And thats it! It may take a little while for everything to propogate, but within the day at the latest you should have a fully functioning blog with a custom domain at https://yourusername.com! All hosted on Github and source controlled and everything. If there are any discrepencies you run into here, feel free to reach out to me and I will do my best to correct them!